
Jigging & Popping Rigging Tips - Part 4: Knots, Connections & Terminal Gear
Posted by OTI on Jun 21st 2023
Discover expert tips and tricks for rigging your jigging and popping setups with our comprehensive guide to knots, connections, and terminal gear. Learn the best practices for securing your line, leader, and lure.
Knots, Connections & Terminal Gear
Now that you have your major components in hand, let's get them ready to fish. We are excited to share our tips and tricks to help you prepare for your fishing trips. While there are various approaches to rigging up, we have compiled a list of knots and terminal connections that we personally use and trust.
From the Spool to the Lure
Let's start with the connection between the line and the spool. Our preferred method involves using a short length of electrical tape on the spool itself. This prevents the spectra line from shifting around the spool while maximizing the line capacity. We wrap the line twice around the spool and secure it with a 4-6 turn cinch knot. The double loop in the knot requires careful tightening to ensure it grips the spool firmly. Leaving a small portion of the tag end tightly wrapped against the spool, we proceed to spool the line under steady pressure using a spooling machine whenever possible. This tightly packed line on the spool not only maximizes capacity but also prevents the spectra from digging into itself under heavy drag settings.
Main Line to Leader
Once the main line is on the spool, the next step is to connect it to the leader. There are several options for this connection, ranging from the complex PR Knot to the simpler uni-to-uni connection. The key is to choose one or two connections that you are comfortable with and practice them until you can tie them effortlessly. The last thing you want is to struggle with knot tying during a wide open bite. For our mid and heavy popping outfits, we use hollow core spectra with a 4" loop spliced into the end. We attach the wind-on leader using a single loop to loop connection.
When it comes to solid core spectra on our light popping and jigging combos, we prefer a short loop created with a Bimini twist or spider hitch. This loop then acts as a single line, which we use to connect to the mono leader using either a wind-on, uni-to-uni, or reverse Albright knot. The choice of knot depends on the specific combo, line/leader size, and intended use. For light popping setups, the Bob Sands knot is also effective, as the orientation of the mono tag end helps the knot slide smoothly through the guides without snagging.
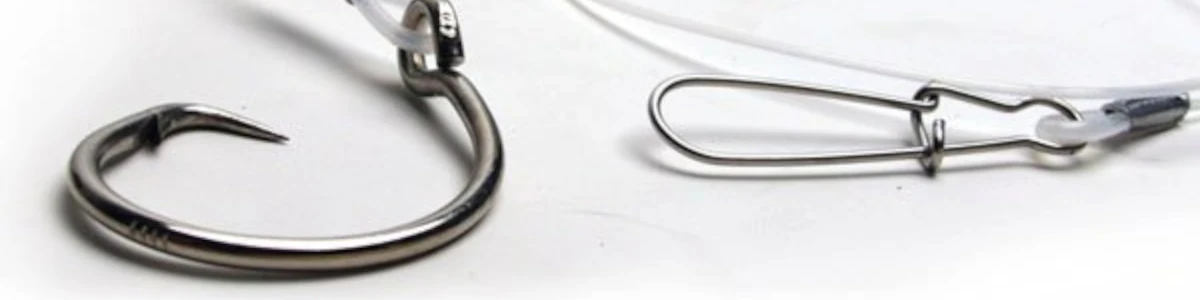
Leader to Lure
The final connection you'll need to make is between the leader and the lure. While there are numerous knots suitable for this connection, we exclusively use a basic 4-turn cinch knot tied with a double line. To begin, we double back several inches of the leader and then crease the bend to a sharper point. This technique helps lock the bend's position and allows the double line to function as a single line. After tying the knot, we carefully tighten it, ensuring that the wraps stay in place without overlapping. Adjustments to the tag end may be necessary to maintain a smooth sliding motion. The end result should be a tidy barrel with two legs passing through the eye of the lure or swivel.
The real secret lies in our quick-change terminal rig at the business end of all our combos. We connect the leader to a swivel/split ring combination, which is then attached to the eye of the lure or jig. Opting for a swivel/split ring provides a superior connection compared to a snap swivel, while also making it effortless to change lures. High-quality split ring pliers come in handy for this purpose. With this simple connection, you can keep your rods rigged and ready to deploy, without worrying about poppers, hooks, and jigs damaging your guides and rod blanks. This approach saves time and the need to tie multiple knots for changing lures.